Archive

Tag Archives: oil lamp

The Last Bung Blog

Really, this will be my last post about bungs.  Not thrilling to read about, I think, but kind of exciting to finish, because you are left with a completely finished surface.  No holes, no unsightly screw heads.

Plugs fitted, trimmed, and fiddles varnished. I see now that I only got one bung really anywhere near in focus. Perhaps it gives you the idea anyway...

I finally plugged three holes that have been open for a long time in the photo below.  There was no excuse not to do it before.  I just hadn’t purposed to do it as part of any project, so it remained undone.  I did these, and 8 holes in the teak bridge deck threshold, which isn’t pictured here.

This fiddle's a larger size, and took regular 3/8" plugs.

Cabin Heat

I’m happy to report that my expectation for the Trawler lamp to provide adequate heat was on target. Several days ago, when Pennsylvania, Baltimore, and the Shenandoah valley were getting a late snow storm, we got a day of rain and 40 – 45 degree (f) temps with blustery wind.  Perfect day to check on the effectiveness of my heating system.

I spent a half hour on the boat with the lamp lit and one burner of the new galley stove lit.  The boat warmed up quickly, and I was able to shut off the stove after 10 minutes.  The lamp, even turned down to a lower setting, kept the chill out of the cabin.  We won’t sail in the dead of winter – just early and late season trips.  Below freezing weather would demand an insulated boat and a real heating system. But for late and early season sailing, the lamp and stove will be more than sufficient.

The circular wick is about 2.5 inches across. When it begins to draw, it produces more heat than you expect. Much more than the common flat-wicked lamps.

This is a poor photo, but just to illustrate the lit stove burner.

This photo was originally designed to show case the finished bungs, but it occurred to me that the lit burner was visible also.

I experimented with the lamp today, as it was a little cooler than on previous days.  The outside temps are about 55 degrees f, so I would definitely notice the difference a heat source would make on a day like this.

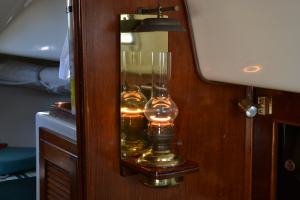
Two things I noticed: 1) The lamp definitely heats the boat (at this modest cool temp) with no problem, and 2) I definitely need to install a heat shield on the bulkhead behind the lamp.  The radiant heat from the lamp heats up the wood adjacent the burner very quickly.

So I have a brass kick-plate for the bottom of a door that I bought long ago to repair an area of the lower head bulkhead (near the sole), that I have never installed.  The particular bulkhead is still in need of some sort of cover-up, but now I will press the kick-plate into service as a heat shield for the lamp. There should be enough brass left over for the other project also.

Brass Kick-plate

I know, it’s hard to tell what that thing is, but that’s about what the plate looks like.


A thousand little projects seem to be on the list, but I’ve come closer to wrapping up a couple started – unbelievably – a couple of months ago.

Lamp Bracket

Warm weather has ensured good luck with epoxy curing, and I’ve finished, broken, and remade the lamp bracket – which required epoxy for success.  I never do anything right the first time, and the lamp bracket was no exception.  First of all, check this photo of the bracket from my last post.  Notice anything special about the grain of the wood?

The grain runs across the width

Yeah, see how the grain runs across the narrow section of the bracket?  That creates a weak spot.  I didn’t realize that until I broke it across there with the slightest of effort.  So, here is what I did to fix it:

A new edge-glued teak board

The new board you see glued up was to be the new bracket oriented with the grain running the other way.  Then I had a truly inspired idea: what if I glued the new on top of the old (repaired) bracket?  That would be very strong indeed, with no tendency to break across the narrow dimension.  That’s what I did.  Here it is installed.

Bracket mounted

You can see the two layers of wood here, and it is very secure.  I visited with my hardware store only twice to get the fasteners sized correctly, but managed to mount it and varnish it twice.

I think I’m going to install a heat shield on the bulkhead behind the lamp.  I don’t know if the bulkhead is going to get hot or not, but there is no need to take a chance.

Fiddle for Stove

The one new fiddle was mounted, and the old ones were moved to the appropriate place, then varnish applied.  I have purchased bungs to fit in all the holes, but I’ve misplaced the plastic bag they came in… so eventually, when I find the bag, I’ll bung the screw holes too.

Varnished fiddle

Hatch Riser

I realize now that I should have photographed the old hatch risers.  They were a good design, but the plastic was at the end of its life.  I’ve glued both of them back together twice, and they eventually break out again.  The plastic was so brittle that it wouldn’t tolerate any extra load.  So I acquired a new/old bronze riser from Bacon’s.  I later realized that it is actually a windshield riser, so the height that I can raise the hatch is a bit limited.  However, it does work, and it is very solid.  It was a pain to mount, which I had to do twice because the first time it was in the wrong place – limited by the excess riser bar that had to go somewhere, when there was no room for it.  Here’s a pic:

Bronze Hatch Riser

I’ll paint the wood mounting block black.

Too Many Fiddles

As a result of the smallest of calculation errors, I managed to fabricate four teak fiddles when I only needed one to complete a project.  I know, how does four become one, and how in the world did I calculate so poorly?  Let me show you first:

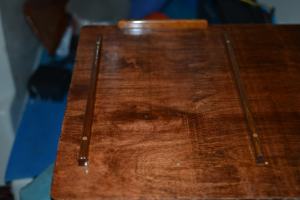
Chart table deployed

You may recall, the chart table pictured above is planned to be the new galley stove area.  This space is perfect for it.  I judged that if I only added a couple of fiddles in both the stowed position (chart table up, stove stowed behind) and the in-use position, I wouldn’t need to strap it in with bungees.  It was a perfect plan, and I went about to create the fiddles as necessary.  Today was the day to install the fiddles, so I carried the stove onto the boat, set it in place, and this is what I saw:

Stowage position, new fiddle installed. The only new one that will fit in the space.

Notice how the fiddle on the left is at the edge of the table?  Notice also that with the stove set back into the stowage area, there is no room for fiddles?  Right.  It fits perfectly, like I noticed originally. With the stove pulled out into the in-use position, there is no room for another fiddle on the right side.  It would be on the edge and hanging over.

It is no problem really.  In fact, completing the project is easier now that I only have to install the one fiddle, and modify the placement of the two original fiddles.  However, I need to use bungees to secure the stove in both positions.  This isn’t a problem either, as it only takes a few seconds to put them in place.

You can see the support under the front of the chart table.  It wasn’t sturdy enough with only the side support which you can barely see on the left protruding down under the front of the table.  This support is actually under the outboard part near the piano hinge.  It’s sturdy enough if there is no weight-bearing down on the front, but it wasn’t adequate to support the stove and any full sauce pans or skillets.  The vertical support you see in the photo makes it very sturdy.  Because the full length support from the piano hinge, there is no side movement or flex.

Well, sorry about the focus. Autofocus grabbed the front of the table instead of the stove, but you can see the bungees holding it in place.

In-use with bungees keeping the stove pressed against the aft fiddle.

And the extra fiddles?  There will be a call for them in the future.  Boats can’t have enough fiddles.

Lamp Brackets

You may recall my plans regarding cabin heat and our large trawler lamp.  I began this project on Saturday by laminating four short lengths of teak to make a board of sufficient width.  The wood was left over from a previous project.

Four lengths of teak decking into one board. Glued with thickened epoxy.

On to this board I scribed the circumference of the fuel tank, and made the circular cut.  I radiused the corners on the front end and sanded it all smooth, removing any extra epoxy and rounding over the edges.

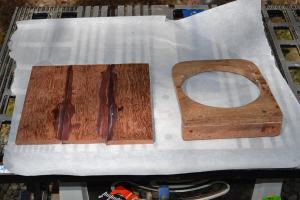
Milled bracket and mounting stock on left.

I cut another piece of teak from a thicker board to use as a mounting block.  These were assembled with screws and glue and the holes bunged.

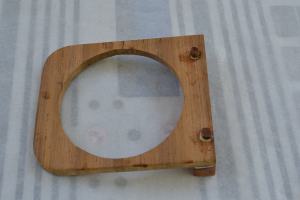
Bracket assembled, screw holes bunged.

Profile

Mounting side

I did test the fit, although I didn’t photograph the bracket and lamp together.  It fits perfectly.  All that remains is to trim the bungs, sand smooth, varnish and mount on the bulkhead.  Yes, that is the ubiquitous Gorilla Glue you see oozing out of the joints.  It will sand off and be invisible afterward.


\


Sounds a lot like watching paint dry or grass grow.  Yeah.  You need something else to do in the mean time.  I had ground out and refilled “one more time” (actually, once more than my impatient nature wanted to) those areas that really needed one more application.  I was waiting for them to cure so I could grind them smooth before I put the tools away for the day.

So while I was waiting, I decided to begin the small mods needed in my galley to accommodate my new Origo stove.  I posted about this here, a few weeks back.

I needed to fabricate more fiddles to hold the stove in place: several for the “storage position,” behind the chart table, and several for the “in-use” position, with chart table open.  There were already two in place, so I dismounted them and brought them home for copying in the shop.

First I selected the materials.  I have some left-over teak decking (.5″ x 2″) from another project, and that halved seemed just about right.  So, here is a photo of the teak lumber, and the existing fiddles from my chart table.

Teak: finished and raw

Next step was to cut to length, then rip in half.  That left me 4 rectangular pieces.
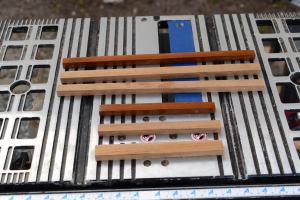
Next step was to round off one side of each piece so that the fiddles have a squared off base and rounded top profile.  I thought for a while how to achieve this.  In the past I have clamped my belt sander into a jig  – which converts it to a stationary sander – and shaped the piece at hand that way. But sometimes a hand tool is faster and flexible.  I chose to attempt the shaping with my block plane. The results weren’t perfect, but when I’m through sanding them, I doubt you will be able to notice the difference from shaped on a power sander or planed by hand.
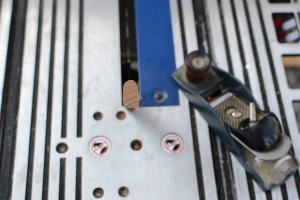
You are looking at the end of a new fiddle, shaped by the plane on right

Finally, you might have noticed that the short fiddle in the bottom of the photograph above looks to be cut larger than the others.  That’s because I didn’t get it centered perfectly on the saw.  I rarely do anything “just right,” but happily, it serves my purpose this time,  I will use the taller of the pieces in the storage position, aft-most in the space.  This will make me feel a bit more secure when the boat is pitching in a seaway if that fiddle is a bit taller.

Cabin Heat

I’ve been casting about for years on this subject, and think I’ve lighted upon a workable solution.  A few years ago, I happened upon ownership of a large trawler lamp that was being discarded.  I have admired these things for years, but having no real space or use for one, I never bought one.  Never even thought about it, realistically.  However, this was a windfall, and I availed myself of the opportunity to own one.  That was five or six years ago, and it has been used in a purely decorative fashion since then.  In my house.  The boat is too small to accommodate it.

Trawler Lamp in my living room

I have always noted that the lamp put out an incredible amount of heat.  This winter, as I used the lamp in our home, the light went on for me, so to speak.  The circular wick in this large-format oil lamp is a veritable furnace.  Even on a low setting it really puts out heat.  I could use this to heat the boat.  I just have to figure out how to mount it.

My plan is to fabricate from hardwood a circular bracket (in other words, I cut a hole into a piece of wood).  The hole will accommodate the narrow dimension of the oil tank, but will not allow the flange at the top of the tank to pass through.  This is how it is mounted in its own frame.   Mount the bracket on the bulkhead, and mount the smoke bell that I found at Bacon’s over it.

Smoke Bell from Bacon's. I've been looking for this model that has the adjustable bell position

Profile view

As it rained today, I could neither work on the boat nor work on my shop projects, because my “shop” is outside in my driveway, and my tools are stored in a shed.  So in lieu of a rain-safe location to work, I blogged instead.